4 KiB
| title |
|---|
Support level: Community
Allows users to authenticate using their Google credentials
Preparation
The following placeholders will be used:
authentik.companyis the FQDN of the authentik install.
You will need to create a new project, and OAuth credentials in the Google Developer console. The developer console can be overwhelming at first.
- Visit https://console.developers.google.com/ to create a new project
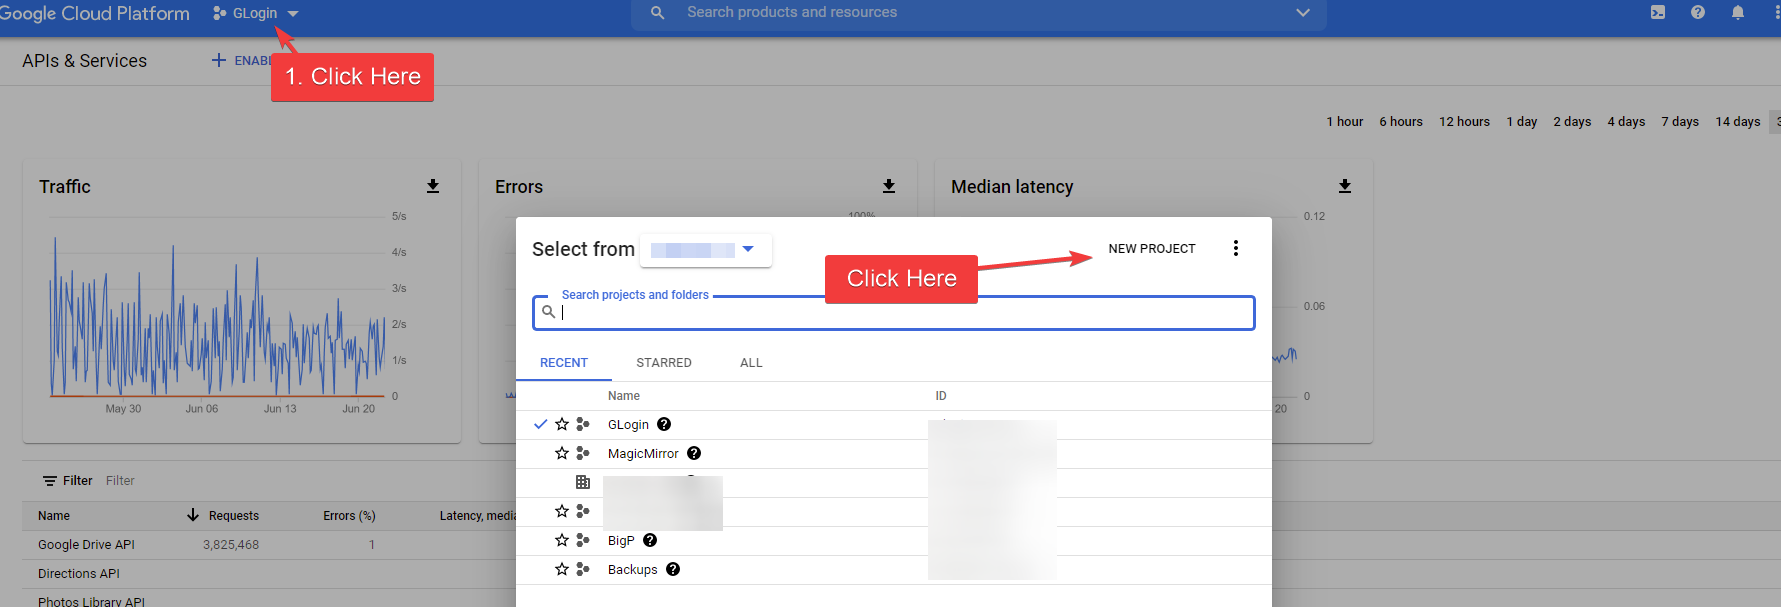
- Create a New project.
- Project Name: Choose a name
- Organization: Leave as default if unsure
- Location: Leave as default if unsure
- Click Create
- Choose your project from the drop down at the top
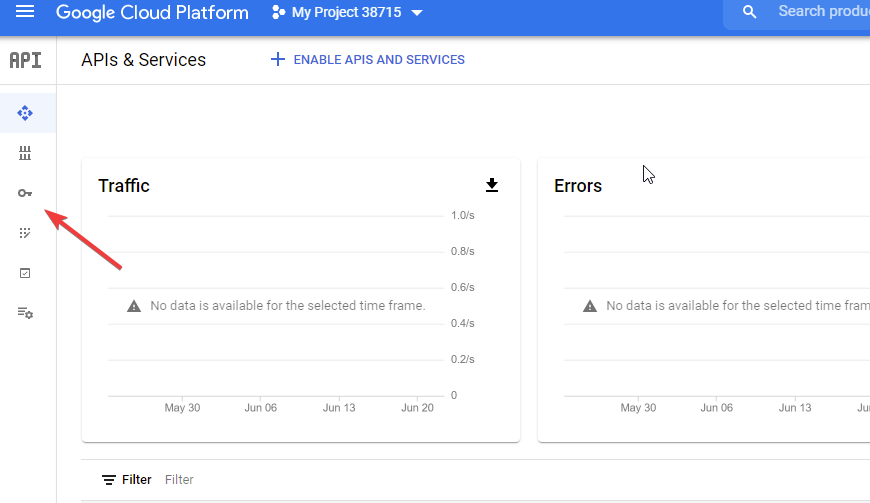
- Click the Credentials menu item on the left. It looks like a key.
- Click on Configure Consent Screen
- User Type: If you do not have a Google Workspace (GSuite) account choose External. If you do have a Google Workspace (Gsuite) account and want to limit access to only users inside of your organization choose Internal
I'm only going to list the mandatory/important fields to complete.
- App Name: Choose an Application
- User Support Email: Must have a value
- Authorized Domains: authentik.company
- Developer Contact Info: Must have a value
- Click Save and Continue
- If you have special scopes configured for google, enter them on this screen. If not click Save and Continue
- If you want to create Test Users enter them here, if not click Save and Continue
- From the Summary Page click on the *Credentials link on the left. Same link as step 8
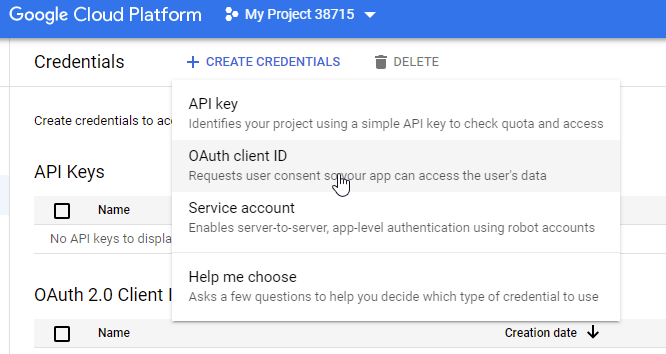
- Click Create Credentials on the top of the screen
- Choose OAuth Client ID
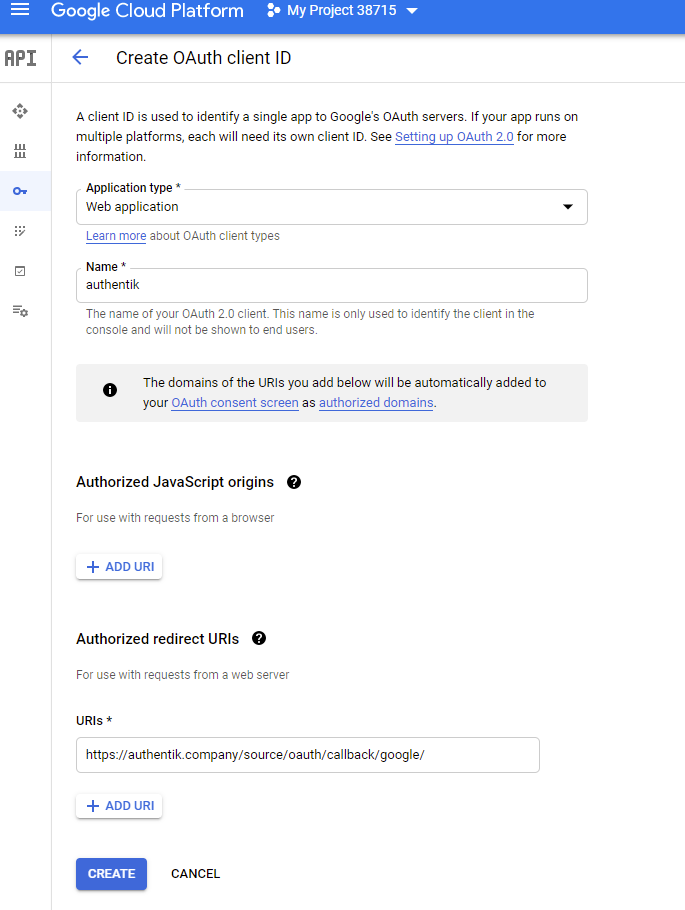
- Application Type: Web Application
- Name: Choose a name
- Authorized redirect URIs:
https://authenik.company/source/oauth/callback/google/
- Click Create
- Copy and store Your Client ID and Your Client Secret for later
authentik
-
Under Directory -> Federation & Social login Click Create Google OAuth Source
-
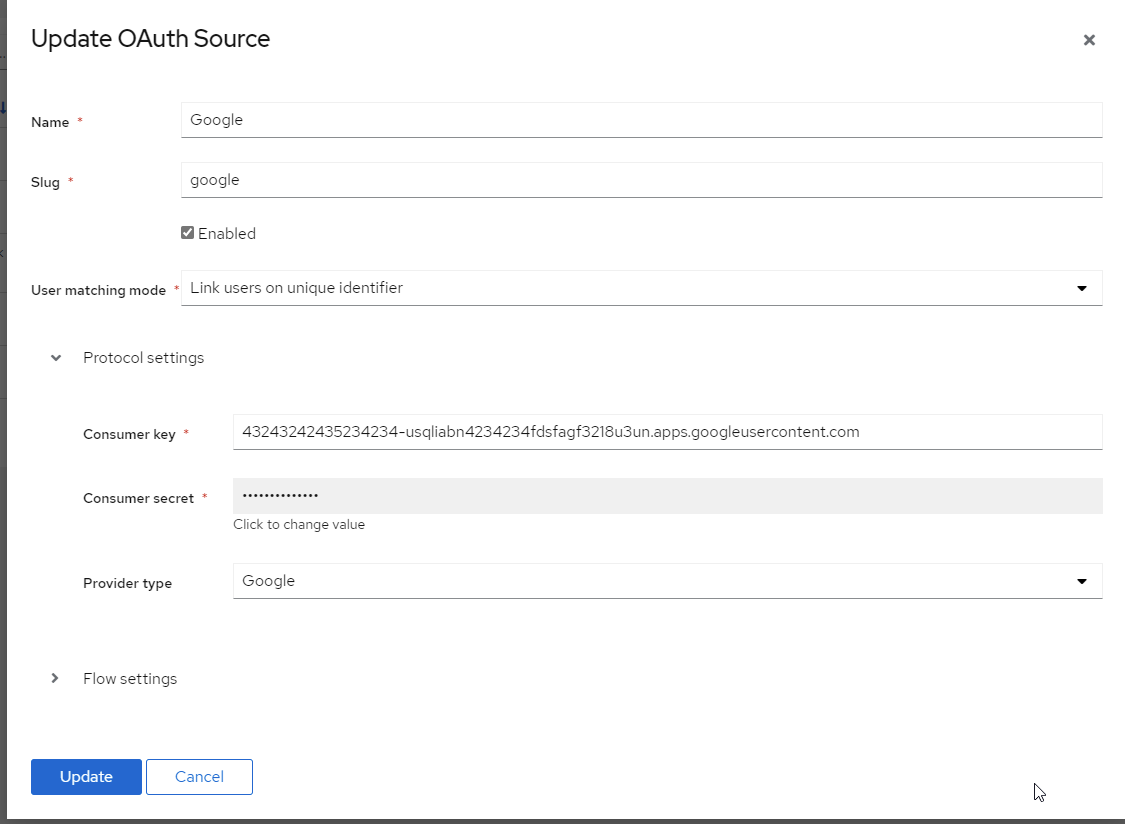
Name: Choose a name (For the example I use Google)
-
Slug: google (If you choose a different slug the URLs will need to be updated to reflect the change)
-
Consumer Key: Your Client ID from step 25
-
Consumer Secret: Your Client Secret from step 25
Here is an example of a complete authentik Google OAuth Source
Save, and you now have Google as a source.
:::note For more details on how-to have the new source display on the Login Page see here. :::
Username mapping
Since google does not have the concept of a username, authentik will by default prompt the user for a username when they first enroll through a google source. To change this behaviour and automatically use the email address as username, create an expression policy to set the username to the email, and bind it to the enrollment flow.
Create an expression policy with this expression:
email = request.context["prompt_data"]["email"]
# Direct set username to email
request.context["prompt_data"]["username"] = email
# Set username to email without domain
# request.context["prompt_data"]["username"] = email.split("@")[0]
return False
Afterwards, edit the source's enrollment flow (by default default-source-enrollment), expand the policies bound to the first stage (default-source-enrollment-prompt), and bind the policy created above. Make sure the newly created policy comes before default-source-enrollment-if-username. Afterwards, any new logins will automatically have their google email address used as their username.
This can be combined with disallowing users from changing their usernames, see Configuration.
